Students, levels and groups
The student list underpins everything else: the timetable, attendance, grades and reports all hang off it. Better to build it properly once than to fix it all year.
In brief
- The difference between a level and a class — and why it matters.
- How to import a whole school from a single file.
- How a parent gets linked to their child, and why they see nothing before that.
Levels and classes
Kiteba keeps apart two ideas that are often confused, and that are independent here:
| Idea | What it is | Example |
|---|---|---|
| Level | How far along the student is. A student holds a single level. Levels can nest inside one another. | Year 7, Second year, Cycle 2 |
| Class / group | Who they take lessons with. A student can belong to several groups. | 7B, Drama club, Piano group A |
Because students at the same level do not necessarily take the same lessons. In a music school, two second-year students can sit in different groups; in a secondary school, an option group mixes several levels. The timetable hangs off the group, the report card off the level.
The student record
It gathers everything about one student: details, date of birth, level, classes, linked parents, photo consent, permission to leave the premises and medical notes.
Record only what is needed to look after the student — an allergy, an emergency protocol. Anyone on the team with access to the record can read them.
Importing from a spreadsheet
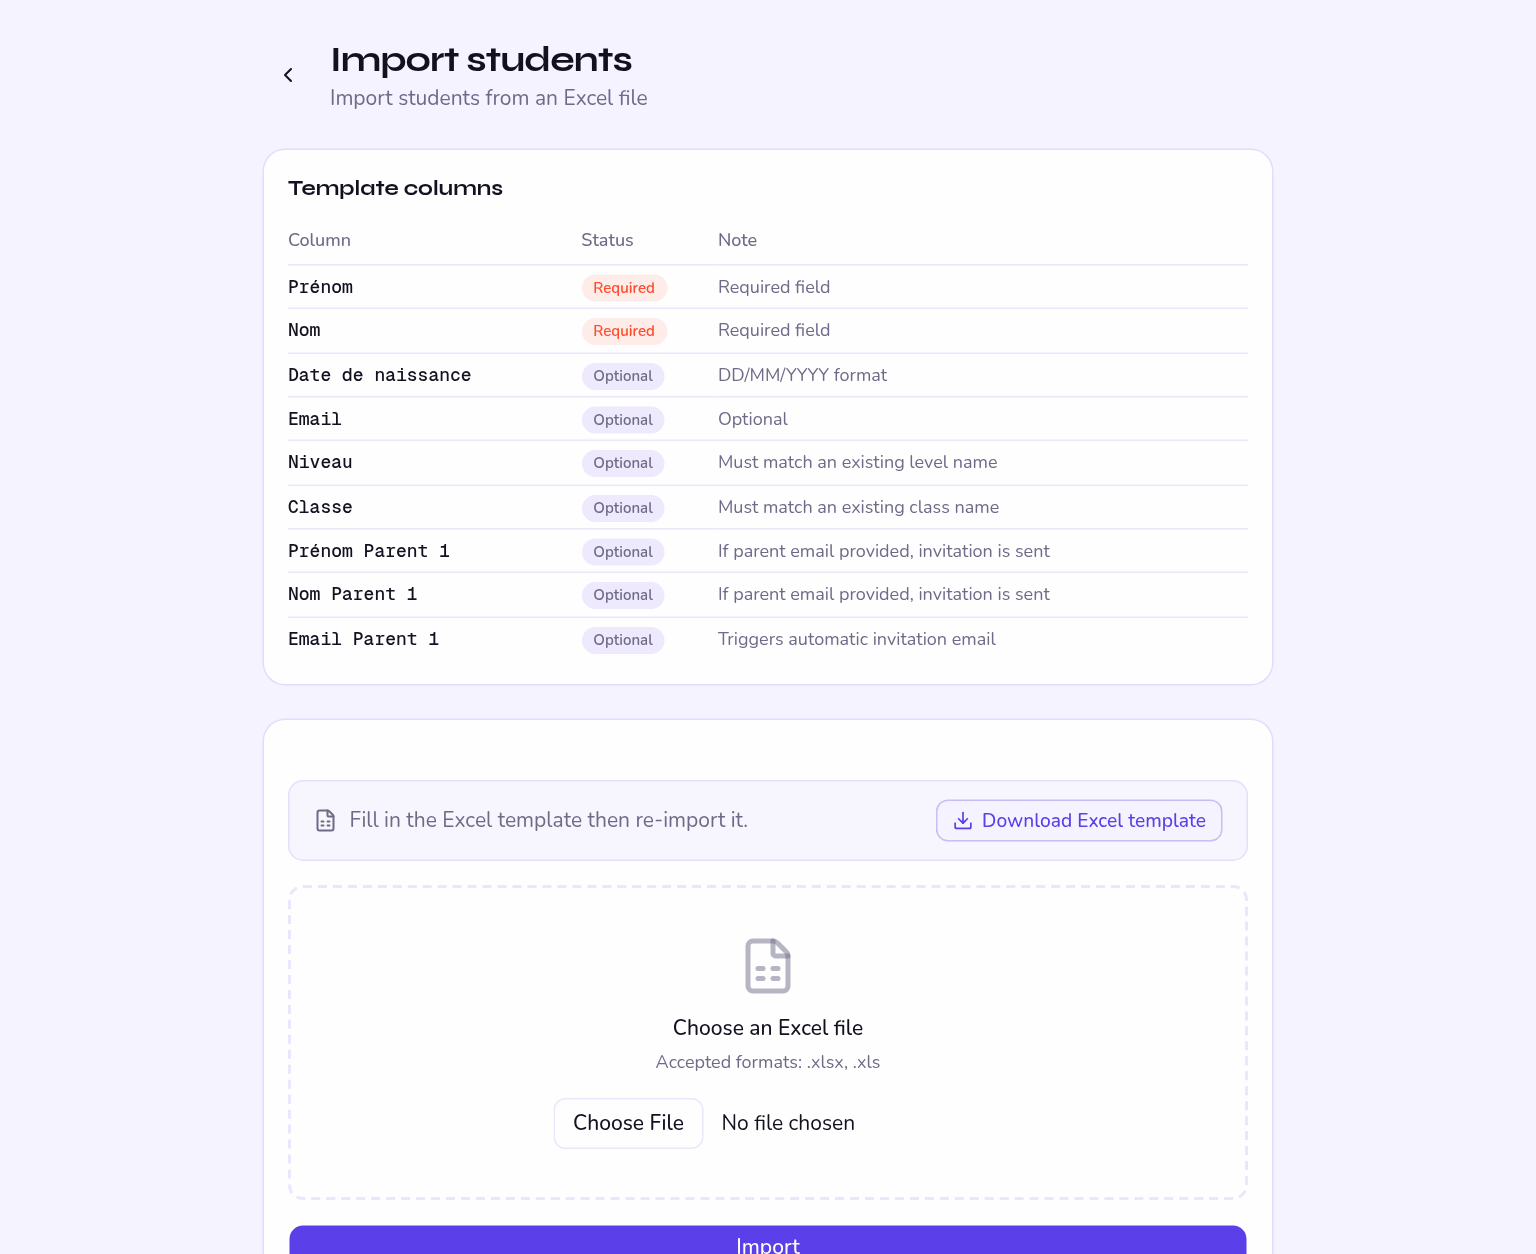
This is the route to take for a new term. The template downloads from the import screen.
- Download the template The Download Excel template button gives you a file with the right columns.
- Fill it in
Column matching is forgiving: French and English headers are both accepted, along with their variants (
prenom,first_name,firstname…). So you can start from an export of your old system without renaming everything. - Import the file Missing levels and classes are created on the fly. Up to two parents per student are invited by email.
- Read the report A line-by-line report flags the errors. A failed line does not stop the import: the others go through, you fix and re-import only what failed.
Import a short extract to check that columns are recognised and classes are created the way you expect. It saves cleaning up three hundred misplaced rows.
Linking parents
Linking always happens in two steps:
- You declare the parent From the student's record or through the import. The parent gets an email.
- The parent confirms They open the link and confirm. Until they do, they see nothing: no grades, no absences, no timetable.
So if a parent tells you their space is empty, the first thing to check is the state of that confirmation.
Opening a student account
A student account is optional. In primary school it serves no purpose: the data goes through the parents. From secondary onwards, it lets the student check their own timetable and grades.
You create the account from the student record. The student receives a temporary password and must choose a new one on first sign-in.
Changing several students
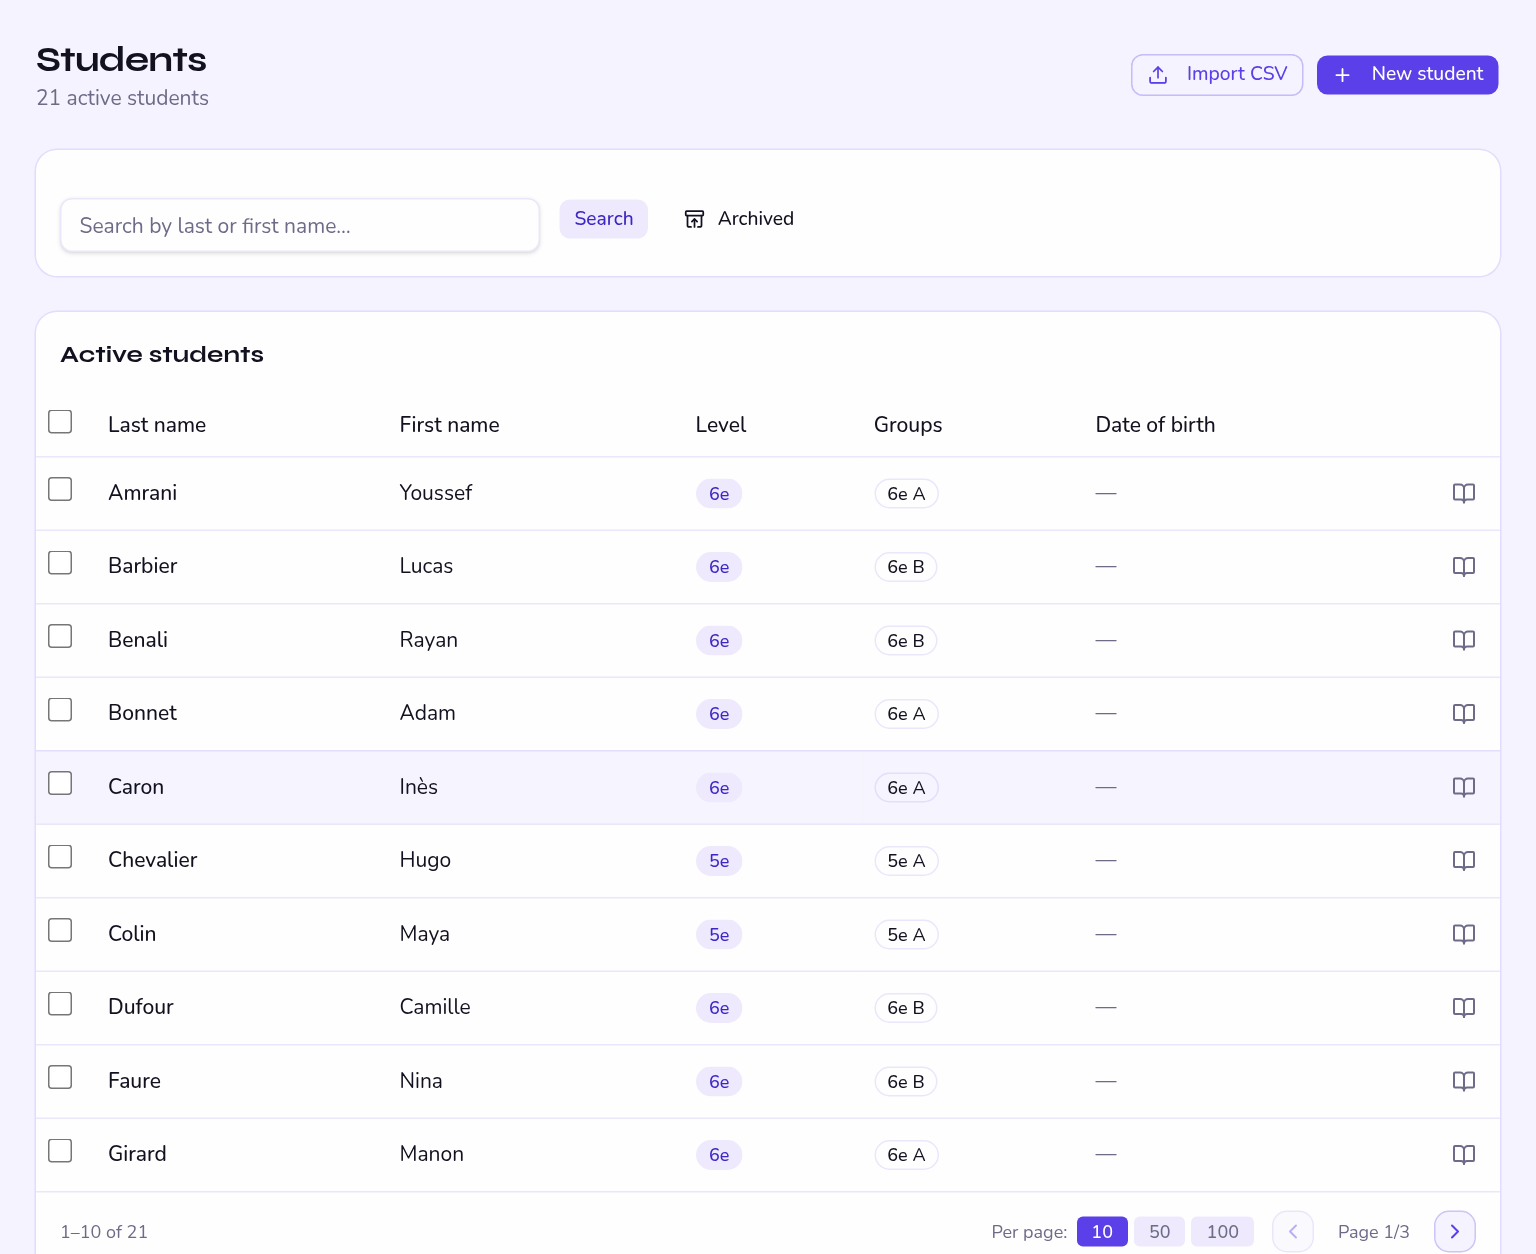
Tick the students concerned in the list and an action bar appears. You can assign a class, change a level or delete in bulk. That is what makes moving a whole year group up bearable.
Removing a student
Removal is soft: the student leaves the lists and stops counting towards your quota, but their history — attendance, grades — stays attached to the school.
Remove the student rather than emptying their record: you free a place in your plan while keeping the data for the year gone by.